-
Getting started
- About the VIVERSE app
- Creating avatars
- Using the VIVE Avatar Creator mobile app
- Signing in to VIVERSE and choosing your avatar
- Navigating VIVERSE with hand gestures
- Navigating VIVERSE with VR controllers
- Things you can do in your home space
- The VIVERSE Menu
- Changing your avatar
- Changing the background theme
- Playing background music
- Accessing your Friends list
- Private Talk
- Changing your status
-
Tools you can use
-
Using content windows
-
Uploading and downloading content
-
Working with 3D models
-
Solutions and FAQs
-
General
-
Content windows
-
Avatar
-
3D models
-
Camera
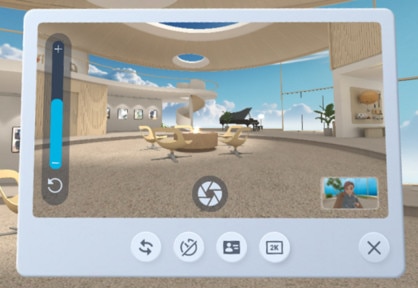
You can use the camera on the
VIVERSE Menu to take pictures of the virtual environment in
VIVERSE.
You can also take selfies.
-
Open the
VIVERSE Menu and then select
Camera.
The camera window will appear.
-
Before taking a picture, you can do any of the following:
Task Steps Change the image resolution Select the Resolution button  and choose a resolution you want to use.
Move the camera window - Aim the beam at the control bar and then press and hold the trigger or Grip button to grab the camera window.
- Do any of the following:
- Move the camera window by dragging it up, down, left, or right.
- Push or pull the window by tilting the thumbstick forward or backward.
Zoom in or out - Drag the slider up or down to zoom in or out.
- Select
 below the slider to change back to the default zoom level.
Set a timer Select  and then choose the time delay.
Switch between the main and selfie cameras Select  .
.
Show nameplates Turn on the Nameplate toggle  to include nameplates when capturing pictures of your friends or taking selfies.
-
When you're ready to capture, select the shutter button
 .
.
Tip:
- Select the thumbnail in the lower right to view the last picture taken. Select the thumbnail again to switch back to the viewfinder screen.
- Images will be saved to the cloud automatically. You can download them to your computer. For details, see Downloading screenshots and other files created in the virtual space.
Was this helpful?
Yes
No
Submit
Thank you! Your feedback helps others to see the most helpful information.