VIVE Pro HMD
Setup guide
Installation overview

Access setup guide

Check software installation and base station status

Set up the link box

Set up the headset

Pair the controllers
What you'll need
VIVE software installed

Active base stations
VIVE controllers
VIVE software installed, Basestations are ready, a pair of VIVE controllers.
IMPORTANT: Base stations and VIVE controllers are not included in the VIVE Pro HMD package. You can purchase these hardware separately from the VIVE store.
Step 2
Check software, graphics card, and base stations status
IMPORTANT: VIVE Pro needs the latest software and driver versions to run VR content.

Make sure that required VIVE and SteamVR software are installed.
If not, download and install via VIVE Setup.


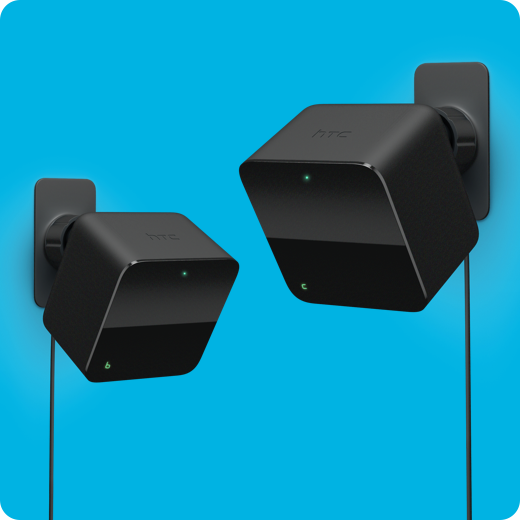
Confirm that the base stations are already set up and active.
- Check that the status lights are both green.
- Click here for more base station setup tips.
Step 3
Set up the link box
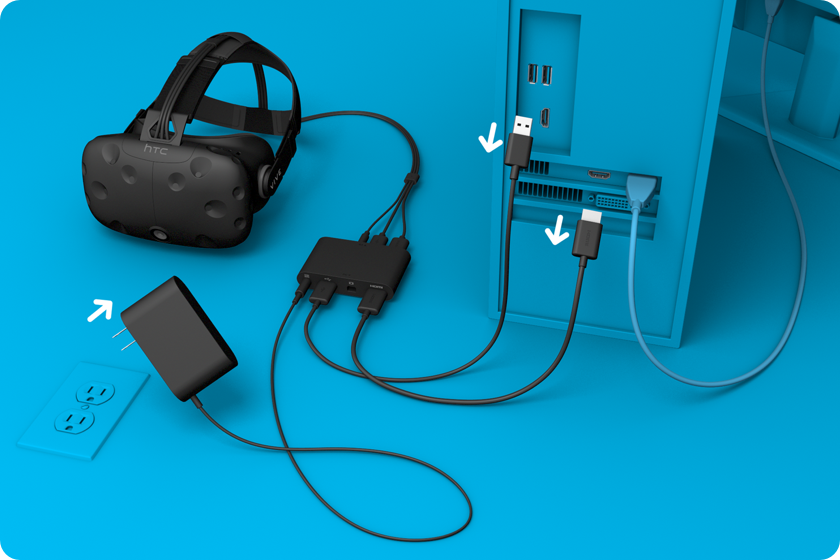
- If you're using an old version of the link box, unplug its cables from your computer.
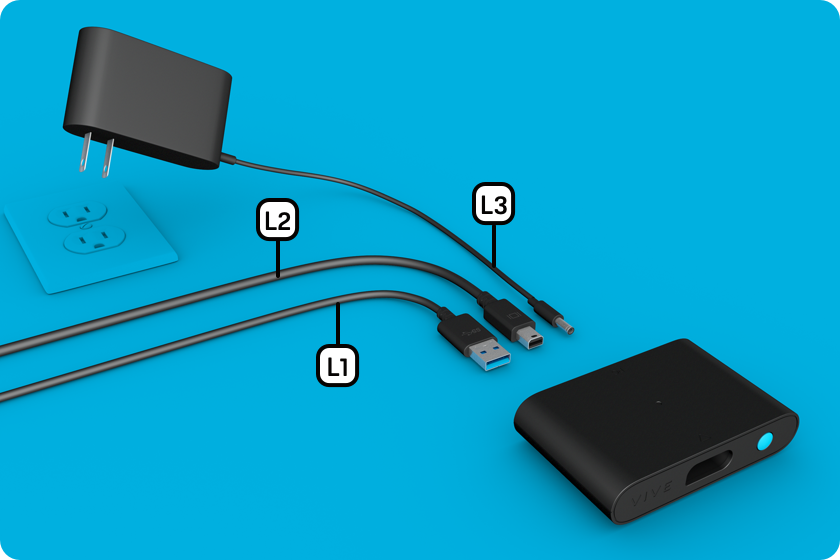
- Find the link box and check its components.
 Link box
 USB 3.0 cable
 DisplayPort cable
 Power supply
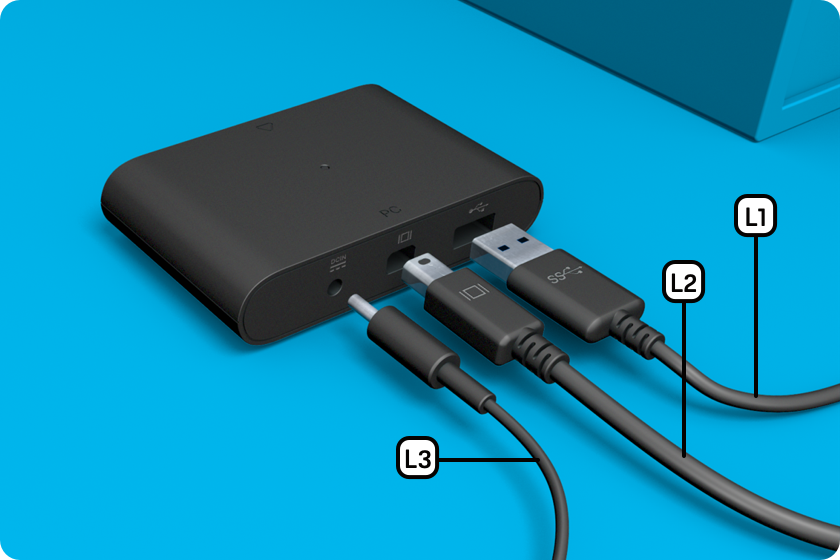
- Connect the USB 3.0 cable , DisplayPort cable and power cable to the link box
and to a power outlet.
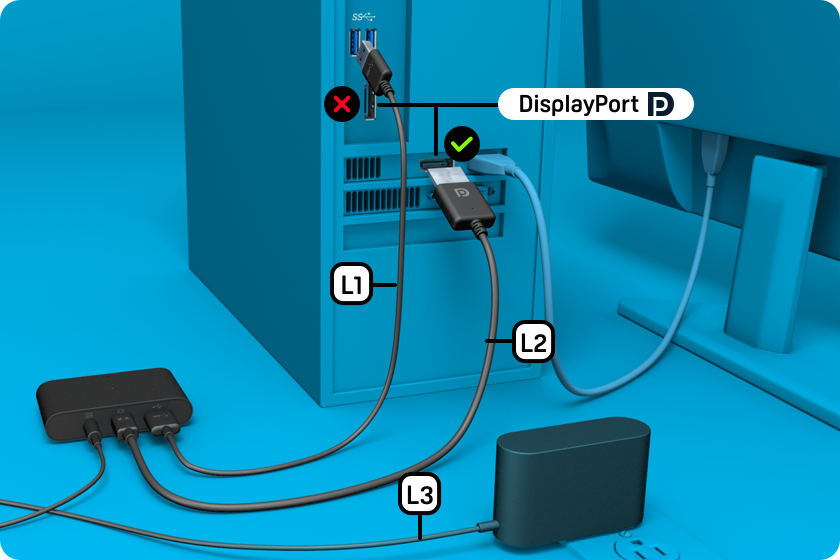
- Connect the USB 3.0 cable to a USB port on your computer.
- Connect the DisplayPort cable to the dedicated graphics card on your computer.
IMPORTANT: The DisplayPort cable must connect to the same graphics card that is connected to your monitor.
Step 4
Connect the headset to the link box
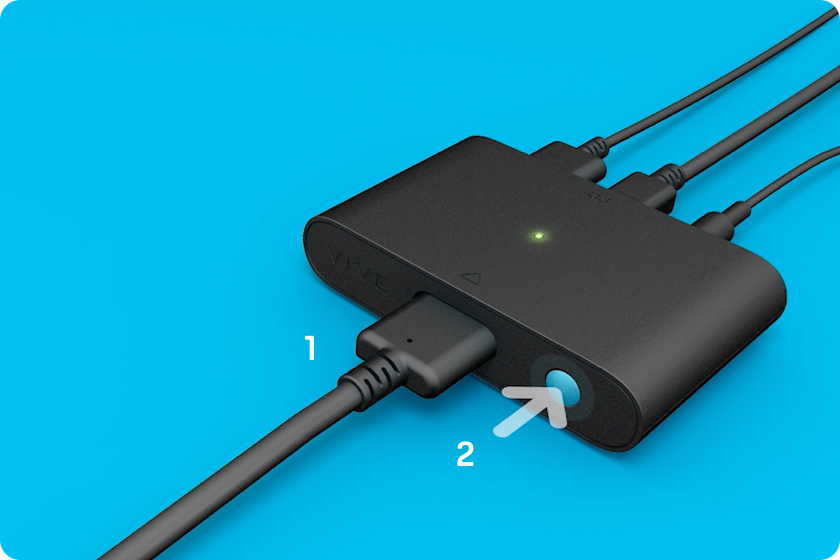
- Plug the headset cable into the link box.
- Press the power button on the link box.
Windows will install the device drivers for the headset.
Step 5
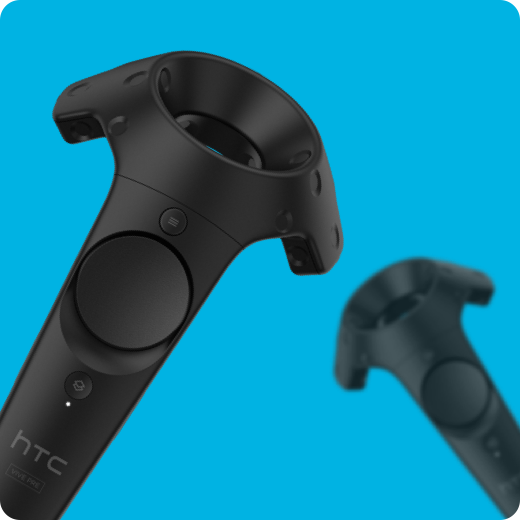
Pair the controllers
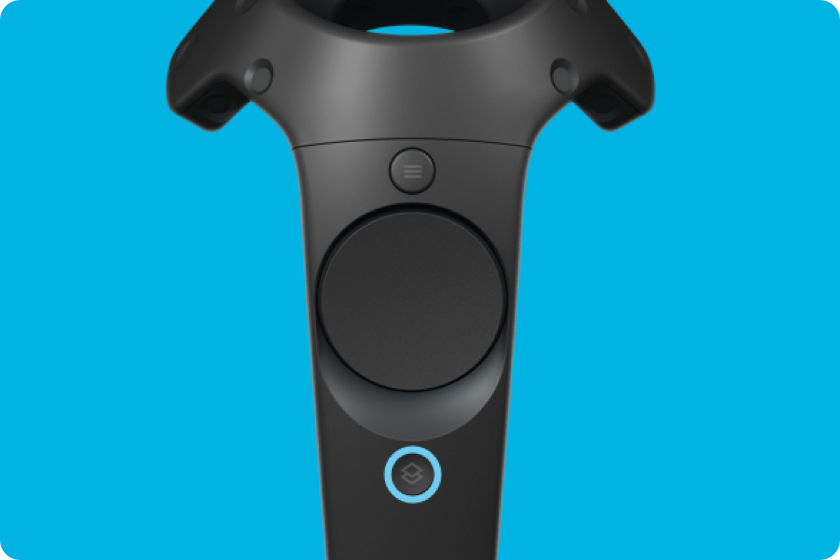
- Turn on the controllers.
Press the System button to turn on each controller.
- Launch SteamVR and check that the headset is ready.
- Pair the controllers.
Right-click the controller icon, and select Pair controller.
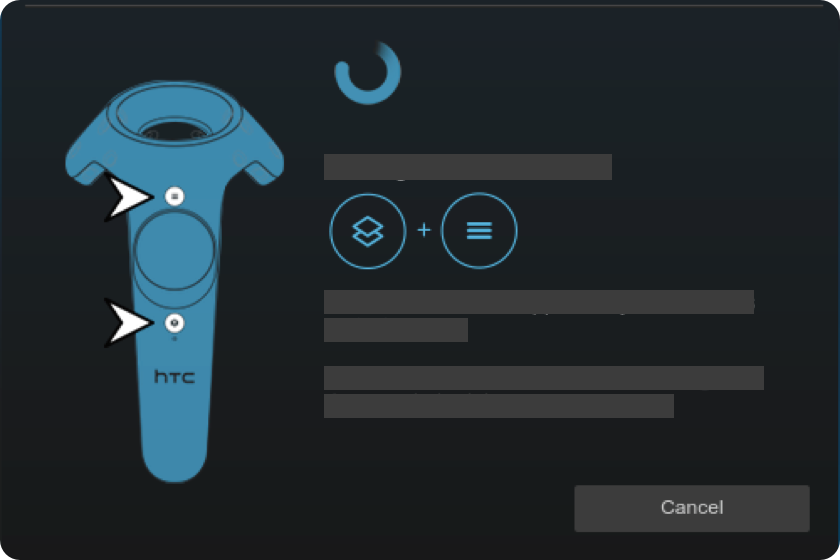
- Follow the onscreen instructions to pair the controllers.
The status light turns solid green when the controllers are paired with the headset.
Learn about the status light on the controllers.
Congratulations!
You can now put on the headset.
Tips for wearing the headset