-
Introduction
-
Hardware
-
System setup
- Setting up VIVE Mars CamTrack
- Example virtual production studio setup
- Connecting Mars to your PC
- Mounting VIVE Tracker (3.0) to Rover
- Connecting Rover to Mars
- Setting up the base stations
- Tips for setting up the base stations
- Adding Mars as an endpoint in Unreal Engine
- Enabling FreeD on Mars and adding Mars to Aximmetry
- Manually updating the Mars firmware
-
Camera calibration
-
Real-time compositing in Unreal Engine
-
FAQs
- How many base stations can I use?
- Can I use an odd number of base stations?
- Cleaning the base stations
- Can I use more than one VIVE Tracker (3.0)?
- Why does VIVE Tracker (3.0) automatically turn off?
- How do I verify that VIVE Tracker (3.0) is detected?
- What does the status light on VIVE Tracker (3.0) mean?
- Why doesn't the VIVE Tracker (3.0) status icon on the Mars dashboard turn blue?
- Troubleshooting VIVE Tracker (3.0)
- Why can't I see the incoming video feed in the Camera Calibration Tool?
Enabling FreeD on Mars and adding Mars to Aximmetry
FreeD is an industry-standard protocol used by cameras to directly send tracking data—such as transform, rotation, focus, and zoom—to virtual production systems.
It allows production systems to incorporate realistic virtual studio sets into video productions without the need for additional hardware.
Here's how to enable FreeD on Mars and add Mars to Aximmetry:
-
On the
Mars dashboard, tap
Settings and check your firmware version. Make sure you have
Mars firmware 2.03.999.1 or later installed.
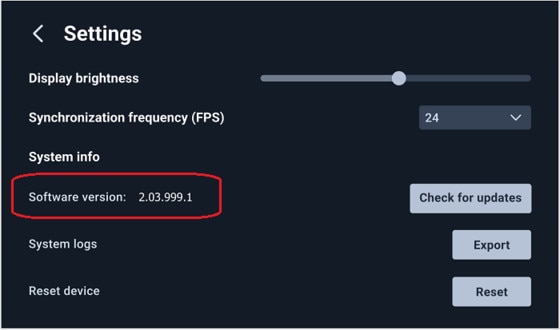
For details on how to update the firmware, see Manually updating the Mars firmware.
-
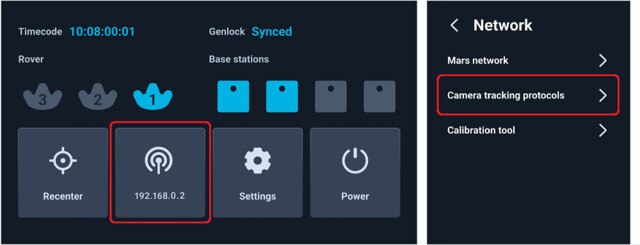
On the
Mars dashboard, tap
Network (or tap the
Mars IP when the network is active), and then tap
Camera tracking protocols.
-
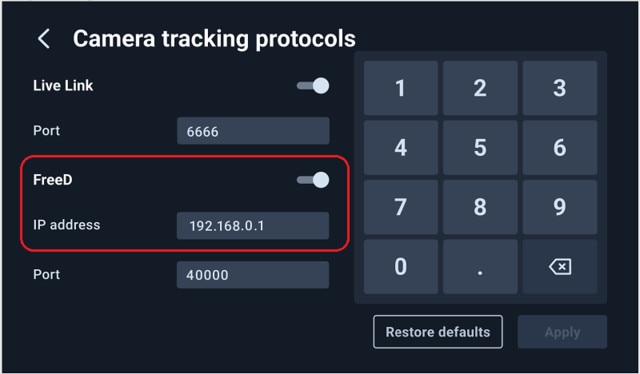
Turn on
FreeD and enter your computer's IP address.
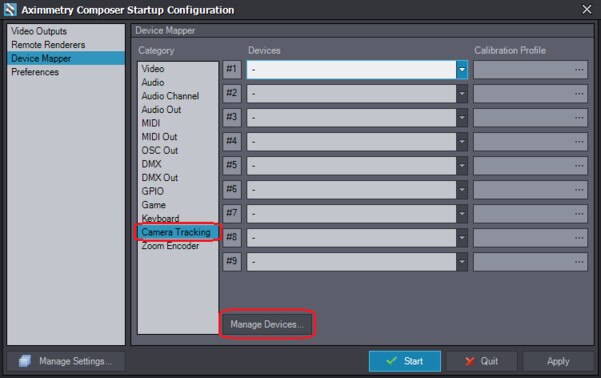
- On your computer, launch Aximmetry. The Startup Configuration window will be displayed.
- Click Device Mapper in the left pane.
-
Under
Category, select
Camera Tracking, and then click
Manage Devices.
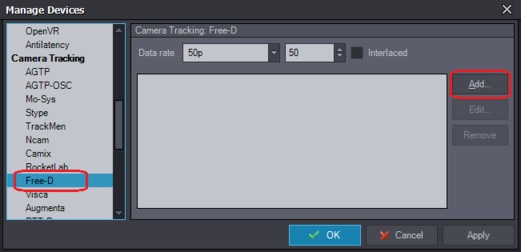
-
In the
Manage Devices dialog box, select
Free-D under
Camera Tracking, and then click
Add.
The Add Device dialog box will be displayed.
-
In the
UDP port field, enter the port number that appears under
FreeD on the
Camera tracking protocols screen on the
Mars dashboard.
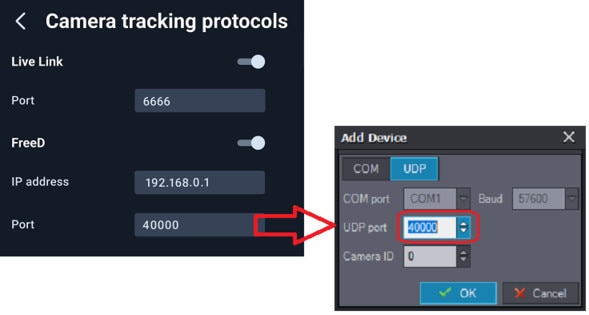
- In the Camera ID field, select 1 to associate it with Rover 1's Ethernet port on Mars, and then click OK.
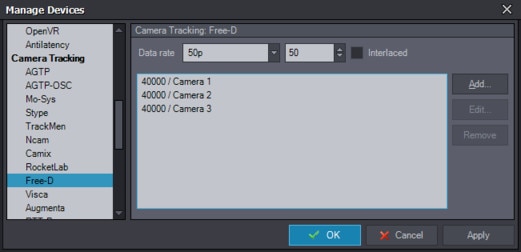
-
Repeat steps 7 to 9 to add
Rover 2 and
Rover 3. In the
Camera ID field, select
2 and
3 respectively.
Was this helpful?
Yes
No
Submit
Thank you! Your feedback helps others to see the most helpful information.